, Custom Firearm Engravers")
- Home
- About
- Membership
- The Engravers
- Convention
- Awards
- Auction Gun
- Magazine
- Shop
- Links
- Your Account
- Connect W FB
- Members Only
- Login
- Logout
- Contact
, Custom Firearm Engravers")

![]()
| Steel Inlay step by step |
Wow, looks like the link to the pic is bad. Oh well!
|
This is how I do steel inlay. It is very similar to gold inlay with some important differences. Hopefully this will pique your interest in trying this yourself.
|
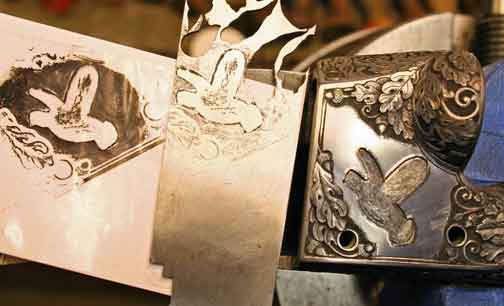
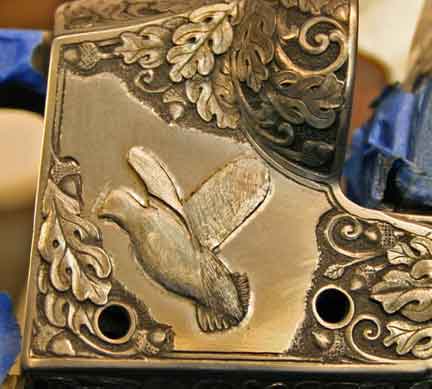
In this next photo you can see the relief cutout in the shotgun (now undercut as you would for gold), and the steel with an in transfer of the quail shape. I stuck the tape from the transfer onto a white paper to make it easier to see.
|
The quail has now been cut out of the steel. I use 1018 non-hardening steel for the inlay material and cut & grind it to the approximate thickness desired. 1018 is pretty soft for steel, is easy to work and it will blue or plate nicely. This shows the backside of the inlay where I'm using a flexshaft with a round burr. I'm carefully relieving the material from the underside of the quail. I'll keep going with this until the bottom side is cupped, leaving a thin edge the original material thickness all around the perimeter of the inlay. This step is crucial to successfully inlay steel in this manner.
|
Oops, forgat to attach the pic!
|
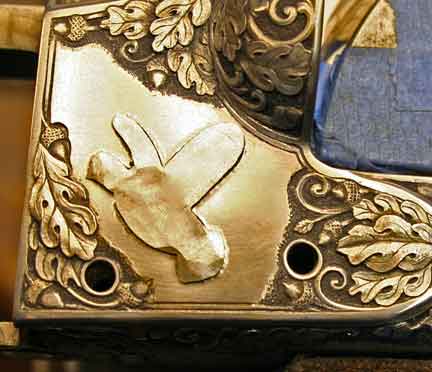
Here the quail has been hammered in place. With the piece to be inlayed haveing a sort of domed shape one whack is usually enough to set it into the undercut in the gun. To set the inlay I use either a 1/2 inch steel rod or a short hammer head I had made that is about 1" in diameter to set the steel inlay into the cavity. The location of the inlay in relation to the structure of the gun is the determining factor on the choice of setting tool. Bear in mind that some guns have some pretty thin spots...be extremely carefull when whacking around like this! Anyway, once the seel is set in place you can check your success by using a scribe or other pointed object to try to gently pry the piece out of the cavity. If you did it right you will have to chisel the piece out of the cavity in order to remove it.
|
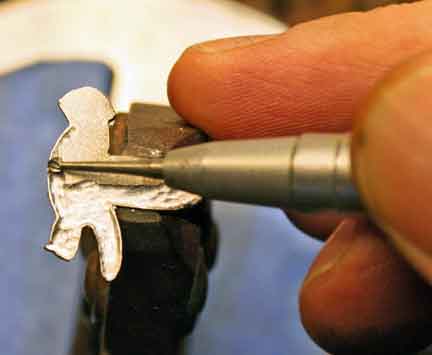
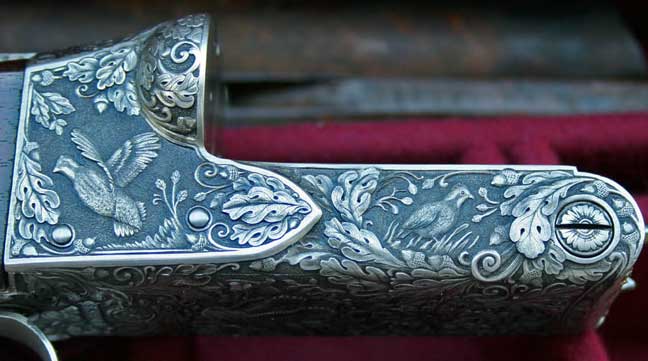
Here I'm starting to rough shape the quail with flat chisels. At this point I'm going for a general shape, not an exact likeness
|
In this shot some detail has been added to the tail. I'll keep shaping & adding detail until it all (hopefully!)looks like a quail.
|
Nice pictures and instructions Weldon.
|
Hi Weldon.
|
This is really interesting. If I understand it right it seems that by creaing a cupped shape it becomes like a freeze plug in an engine block. When one drives it in by smashing down the middle it causes a slight expansion pushing the sides out tight.
|
Weldon,
|
Marty, Andrew, Lee & Rex,
|
It's rare but ocassionally the farm boy get's it right. I am looking for the opportunity to try it. Alright guys now we know how to do the really cool steel inlay on a cast iron piece. You still have time to have it ready for Reno.
|
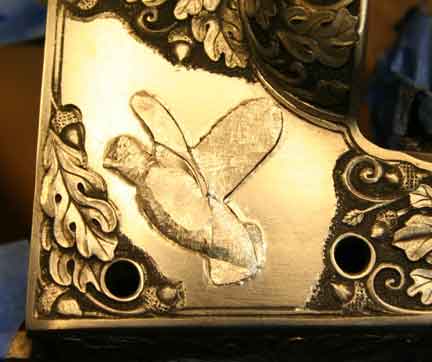
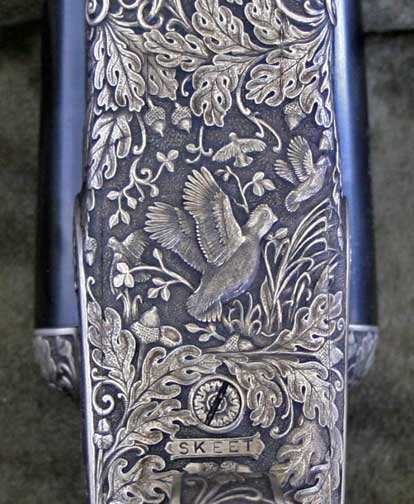
Here is a pic of the completed project.
|
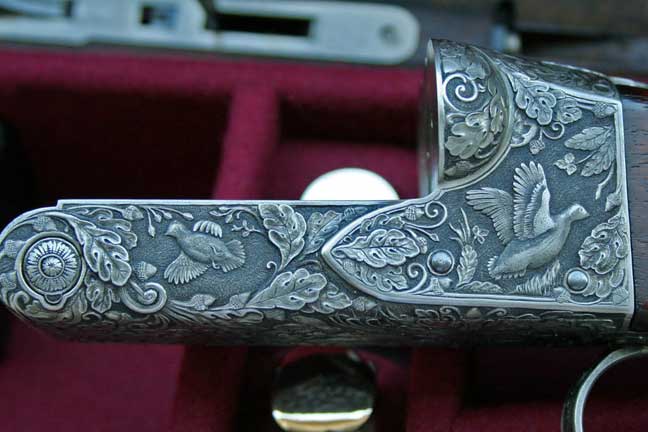
Looks real nice Weldon...do you have a picture of the bottom of the action?
|
Weldon
|
Thanks Marty,
|
Here is the left side
|
Thanks for the tutorial. The pictures help a lot in viewing how you accompish the overlay.
|
Sorry, it looks like an overlay, but is an inlay.
|
Hi Glen,
|
Weldon
|
| Respond |


Site Copyright 2012 by FEGA
Terms of Use